Tuesday, September 10, 2019

Technique Tuesday - Shaker tags created for Kaisercraft

Hello and welcome back to the blog, it is Hetty with you today sharing my very first Technique Tuesday blog post.
Today I would like to share with you some shaker tags using the cute Peppermint Kisses collection.
Products Used:
Papers: Peppermint Kisses Collection: PP1075 Paper Pad|CT969 Collectables|
KC Products: Permanent Black Kaiser Ink|Kaiser Christmas Sentiment Stamps|Kaiser pocket pages or album inserts|Kaiser Die Cut Machine|Kaiser White Cardstock|
Other: Fuse Tool|Punch Tool|Tag Dies|Eyelets|Glitter|Thread|Washi Tape|
Start by die cutting to large tags from your white cardstock.
Next cut large tag from chosen printed paper from the paper pad and lay the smaller tag in the middle of the big one as seen in photo below.
You should now have something like this:
Glue the two white tags back to back (I like to use two to for sturdiness) add the ‘from – to’ sentiment to the back of the white tag.
Glue the printed front onto the front of the white tag and you now should have something like this:
Next grab your pocket page or album insert and add your large tag on the top. Add some washi tape to hold it in place.
Run your fuse tool along the sides and the bottom of the tag but not the top sides just yet as you need to insert your tag first.
Trim closely to the seam but leave a big gap at the top. You should now have something looking like this:
Insert your tag and add other embellishments like glitter and whatever else you would like to add to your shaker tag.
Now add the die back on top and line it up so you can finish the top edges.
Trim off excess plastic. Punch a whole through the top, add an eyelet and some ribbon or thread. Embellish the outside with your favourite pieces from the collectables range.
That is it, you are done. I hope you liked this tutorial. These tags are so fun to make and the best part is they are reusable. Write on the back with a permanent marker and it wipes off again easily with some methylated spirits or something similar.
I made a special display box so I could store my cards, gift cards and tags. Such a cute range, perfect for kids and kids at heart.
That is it for me today – Happy Crafting!
Until next time…..
Hugs
Hetty

Monday, September 2, 2019

Snapshot - layout created for The Dusty Attic

Good Morning Dusty fans and welcome back again. I feel like the weeks are flying past and before I know it it is time for another blog post. So without further ado I would like to share with you today this layout.....

Snapshot


I used numerous Chipboard pieces on this layout as well as some of my favourite 49 and Market papers and flowers.

To start with I added some pink paste through a Dusty Attic Stencil - DA 1494 Creative Script. It is only very subtle but created some texture on my background. Next I layered some 49 and Market Laser Cut Shapes to add behind my photo and create some dimension.

Also behind the photo I added the gorgeous Mystic Frame which I painted with some Dusty in colour paint - Sugar Plum. Once I had chosen all the chippie I wanted to use on the project I started the process of layering together with some beautiful 49 and Market flowers, glueing them down with my  hot glue gun when I was happy with the placement and design. 

The Wild Grass and Leave Chippie were covered in some chocolate embossing powder while the broken bits, butterflies and sentiment were covered in white embossing powder. I always try to keep the colour combination uniform and not add to many different shades. When too many colours are happening you tend to loose focus of all the elements, in my humble opinion anyway.

Dusty Attic Chipboard pieces used on this project:

Thanks so much for dropping in.

Until next time.....

Hugs

Hetty

Tuesday, August 27, 2019

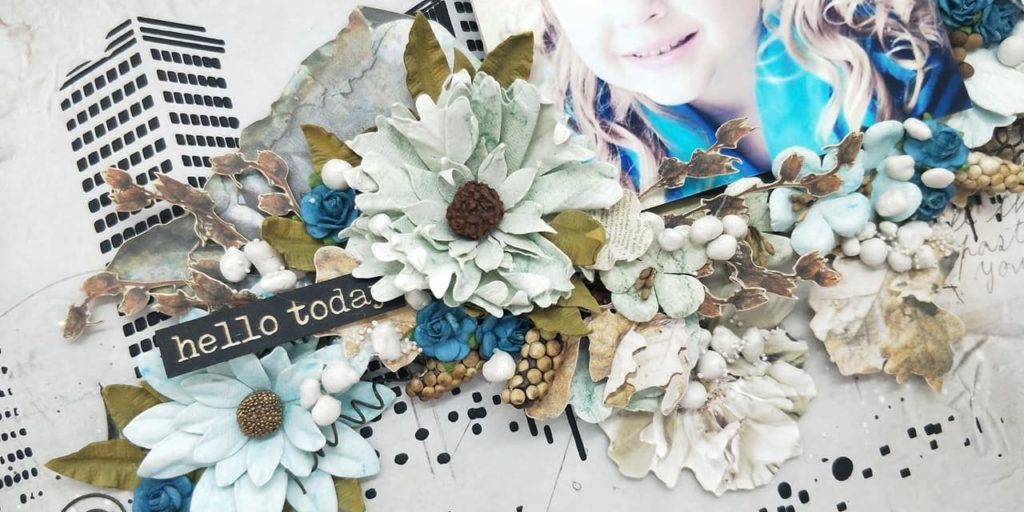
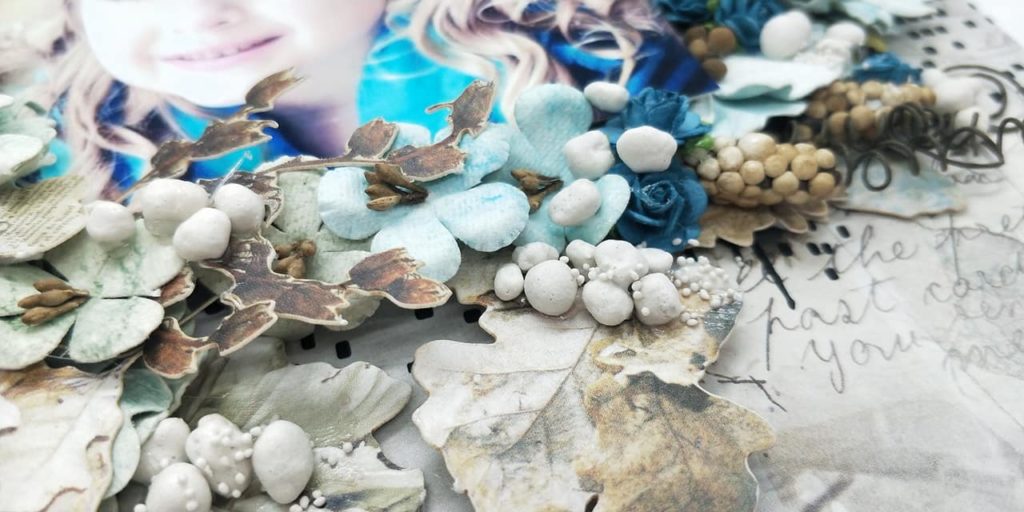
Hello Today layout created for 49 and Market

Hello 49 and Market fans and welcome to another blog post. Today I would like to share with you a layout created with some Captured Adventures paper combined with Vintage Remnants Laser Cut Shapes and some gorgeous Botanical Blends flowers.

"Hello Today" by Hetty Hall

I started by creating my background using a stencil from The Dusty Attic and black Gesso. I then chose some pieces from the laser cut shapes to create a backdrop for my photo. I attached these with some cardboard and hot glue to create numerous layers, this layout turned out rather dimensional.
"Hello Today" by Hetty Hall
The flowers were added on top and in between all the layers, I just took my time working on the design. Once all the bigger flowers found a spot I added all the smaller ones and also added some more pieces from the laser cut shapes. For the final touch I added a Dusty Attic chipboard sentiment and some art stones to add a bit of grunge.
"Hello Today" by Hetty Hall

Thanks so much for visiting the blog, come back again tomorrow for more inspiration from one of the 49 and Market DT ladies.
Until next time….

Saturday, August 24, 2019

Wonderful layout created for Kaisercraft

August 24, 2019
Hi there Kaiser Fans, welcome back to another blog post from me, Hetty with you today. I have to say I am in love with the collections Kaisercraft brings out that contain the foil, they just add that bit of extra pizzazz don’t you think?
PRODUCTS USED:
PAPERS: Let it Snow Collection: P2807 Shimmering|
CT968 Collectables|CR214 Curios|
KC PRODUCTS:|Foam Tape|Foam dots|
The Collectables make it so easy to put together a quick page, looks like you used lots of products.
Check out that beautiful foil touch and this is also a close up of a Curio used, love them!
I had fun actually using multiple photos, I generally tend to just use one but being a Christmas page I thought it would be a good idea to add a few more, I do like how this turned out.
I hope I inspired you to visit your local craft store and buy this collection and start working on your Christmas layouts.
You will find full instructions for this project here.
That is it for me today – Happy Crafting!
Until next time……
Hugs
Hetty

Wonderful layout created for Kaisercraft

Hi there Kaiser Fans, welcome back to another blog post from me, Hetty with you today. I have to say I am in love with the collections Kaisercraft brings out that contain the foil, they just add that bit of extra pizzazz don’t you think?
PRODUCTS USED:
PAPERS: Let it Snow Collection: P2807 Shimmering|
CT968 Collectables|CR214 Curios|
KC PRODUCTS:|Foam Tape|Foam dots|
The Collectables make it so easy to put together a quick page, looks like you used lots of products.
Check out that beautiful foil touch and this is also a close up of a Curio used, love them!
I had fun actually using multiple photos, I generally tend to just use one but being a Christmas page I thought it would be a good idea to add a few more, I do like how this turned out.
I hope I inspired you to visit your local craft store and buy this collection and start working on your Christmas layouts.
You will find full instructions for this project here.
That is it for me today – Happy Crafting!
Until next time……
Hugs
Hetty